Sunday, February 19, 2012

Roses, paper and REAL

So, I got this idea off of Pinterest. I wanted a centerpiece for V-Day that I could use throughout the year as a cute piece on a shelf, but I didn't want to spend a ton of money. So, I bought some branches from michaels (40% off coupon = <$2), reused an ikea vase we had, and rolled some red card stock paper to make this adorable rose display. 


Here's the top view


Here's the tutorial from  Tammy Mitchell on how to make the paper flowers 


So, what do you think, is it better than the real flowers my husband got me?


Molten Lava Cakes


So, if you haven't had Domino's new crunchy lava cakes, you're really missing out. They are out of this world good.

My husband and I really like these, but for some reason ordering dominos dessert didn't seem so romantic for V-day. So I thought "I can make that!",  and I did.

I got the recipe for the cakes from the blog a cup of flour. However, the first round of these was disastrous. The recipe called for 30 ounces of chocolate, and for some reason I didn't think 3 BAGS of ghirradelli chocolate seemed that unreasonable for 4 VERY SMALL cakes... basically it ended up being pure melted chocolate and never baked correctly. Turns out, there was a typo in the recipe and it was only supposed to be 3 ounces. In other words, our first attempt of this had 10 x the amount of chocolate it was supposed to and turned out looking like this:


It was inedible :(. So, here's the revised recipe that not only turned out but was delicious.

First, you mix together the egg, sugar and flour. 


Next, you add in the melted chocolate and butter.

You pour the mixture into greased and sugared ramekins and bake for 10-12 minutes. 


You know they're done when the cake is firm on the outside but gooey in the middle. 


I decided to make some raspberry sauce with mine, which is weird because I don't really like rasberries, but it was delicious!

I put the rasberry sauce around the cake, powdered it with some extra sugar and voila. Lava cakes, home style :). 

Here are the recipes:

Lava Cakes (from a cup of flour
(makes 4 cakes)
3 oz. baking chocolate (I used Ghirardelli 70% cocoa)
1/2 c. unsalted butter
2 whole eggs
2 egg yolks
1/3 c. powdered sugar, plus more for serving
dash of salt
1/3 c. all-purpose flour
  1. Preheat oven to 400° F.
  2. Grease 4 small ramekins, custard cups, or any small (1 c. / 6 oz. capacity), oven safe baking dish. Sprinkle with powdered sugar.
  3. Add butter and chocolate to a microwave safe bowl. Microwave until melted, stirring ever 20 – 30 seconds, or melt in a double broiler.
  4. In a separate bowl, whisk together eggs, egg yolks, powdered sugar, and salt.
  5. Add chocolate mixture and mix.
  6. Add flour and mix just until combined.
  7. Pour into ramekins. Place ramekins on a baking sheet, and bake in the oven 10 – 12 minutes. Do not over bake. Centers should be slightly jiggly and soft looking. A toothpick inserted near the outer edge should come out dry, and inserted near the center, it should come out wet.
  8. Invert cakes onto individual serving plates. Dust with powdered sugar, and serve withraspberry sauce (optional).


Raspberry Sauce (from Andrea Meyer's blog
(makes about 2 cups - I used the leftovers on pancakes this weekend)


1 pint (about 12 ounces) fresh or frozen raspberries, rinsed well (thawed if needed) and drained
1/4 cup granulated sugar
1 tablespoon  cornstarch
2 tablespoons lemon juice
1 cup  cold water
  1. Put the raspberries in the saucepan. Whisk together the sugar and arrowroot and add to the raspberries. Stir in the lemon juice juice and water and bring to a boil. Reduce heat and simmer while stirring until the berries break down and the sauce thickens, about 10 to 15 minutes. Remove from the heat and allow to cool. The sauce will continue to thicken as it cools.
  2. Puree the sauce in a blender or with a handheld immersion blender, then strain it through a fine sieve. Serve warm or cold. The sauce will keep in the refrigerator for up to two weeks.

Saturday, February 11, 2012

Homemade Runzas

There's one thing that Nebraska's got that no other state does... the Runza sandwich!


Ok, that's actually a lie because they recently started franchising in other states including Colorado, Kansas and Iowa... but stick with me here.


I have to admit, Runza makes the BEST burgers, but I'm not actually a fan of their runza sandwiches, which can be ordered at any Nebraska gaming event... but I LOVE homemade Runzas. Whenever I have some leftover cabbage this is my go to delicious treat for my born and raised Nebraska husband.


So, you may be asking yourself "but what's a runza??!!" A runza (also called a bierock) is a yeast dough bread pocket with a filling that consists of beef, cabbage, onions and seasoning. In Nebraska they're shaped in a rectangular shape, although depending where you are you might find them in other shapes (square, triangle, half moon, etc). Think Hot Pocket, but much yummier. Here's the recipe I use to make my Pennsylvania Runzas.


First, we need to make the dough. Sometimes I just buy Pillsbury's French Bread dough from the refrigerated section, while other times I whip up fresh dough in my bread maker. 


So, the bread dough I made this time was an Italian Bread dough from the book 'More Bread machine Magic' I used a bread maker to knead the dough, but you can also do this by hand. It makes a medium sized loaf. 


This recipe makes 8 runzas :).


Italian Bread
1 1/4 cups water
1 1/2 tbsp water
1 t. salt
3 cups bread flour
1 1/2 t active dry yeast


Place all ingredients in bread maker, select the dough cycle and wait :). 

For the Runza filling, I did a variation of something I found here.


Runza Filling
1 1/2 lbs ground beef
1 medium head cabbage, shredded
1 lb mozzarella cheese
2 teaspoons thyme
1 teaspoon red pepper flakes
salt and pepper to taste


Brown Beef and Cabbage in large skillet.
Add seasonings


Next comes the assembly. 


1. Preheat oven to 350 degrees F
2. Divide dough into 8 equal sized balls
3. Roll out dough to form a rectagle (about 4" by 7")
4. Place a spoonful of the beef/ cabbage mixture onto the center of each dough square.
5. Sprinkle cheese on top
6. Fold over the two 'long' sides and pinch together
7. Pinch the ends of the dough closed.
8. Place on baking sheet and bake for 25 minutes.
9. Let cool and enjoy!!


Often 8 runzas are too much for just me and my  hubby. So, what I do is take half the batch and stick em' in the freezer in a freezer safe bag. They freeze great and all you have to do is thaw them before you put them in the oven :). 


The runzas are not only delicious, but they take away some of my home sickness :). 

Saturday, February 4, 2012

Our Cake

Ok, so this is not a craft, nor is it something I made myself, but I LOVED our wedding cake and wanted to share some pictures.

Our theme was 'simple but elegant', which I think is summed up perfectly in this edible piece of art. It's a white chocolate cake with strawberry filling and white chocolate ganache. Their is ribbon on the outside and a gumpaste flower. The cake artist is from Lincoln, NE: www.sweetartweddingcakes.com.

DIY Doily Bags


I made these bags for my bridesmaids.

To make these, you will need:
- black craft paint  ~$1 and I have a ton left over
-small paint brush
- totes I got from Hobby Lobby for ~ $3 a pop (get them when they're 50% off)
-paper doilies (12") ~ $4
-spray glue (I used elmers)

So to make these spray the back of the paper doily with the elmers glue and place on the bag (be careful, because wherever you put it is where it will stay!) Once it's in place, use a paintbrush to paint all of the holes on the doily.


Let DRY!

So, I'm not artistic, so to do the letter, I printed out a large letter on card stock paper and used a exacto knife to cut it out. Then I repeated the procedure of the spray glue and paint. That's it, it's that simple.

I included jcrew flip flops, earrings, and a bridesmaid survival kits in the bag that included pocket shots (an amazing find!) mints, and a whole bunch of beauty supplies. They loved them! Of course, I made one for myself too :).
FYI: Pocket shots are a must for the bags... especially if your BM's dresses have pockets (like mine did)!

DIY Wedding Menus

So these look SO nice, and are relatively quick to make. Again, I used the same paper I did for our DIY wedding Programs so no new paper was needed. Before I tell you how I did it, here's the final product :).


I want to preface this by saying I did not come up with this idea, I just implemented the solution. I followed these directions verbatim to produce my menu. It's really simple to do!

I will say that I couldn't find the punch for these ANYWHERE and I was lucky enough to find a fellow bride from another state that allowed me to borrow her punch! She mailed it to me and trusted that I would return it, which of course I did. So unfortunately you might not be able to reproduce these verbatim, but it looks so nice! I love the silverware punch and the manufacturer needs to start producing it again! 

The file for my menu can be downloaded here


DIY Wedding Programs

So, I got married almost 9 months ago, did some amazing DIY things for my wedding, and was so exhausted by the time I finished, I never shared any of them. So my next posts will primarily be all things wedding.

Today I thought I'd start with my wedding programs! First off, here's what they looked like!


*** photo credit goes to julie branyan photography. She's awesome. Check out her site!

I got the idea for these when I saw something similar in an Etsy listing and thought, I can make that... so I did. I didn't want to buy them from the seller  because they cost $3 a pop! I have to admit, it was a pain getting the photoshop document perfect, but I'm going to save you that hassle and give you my photoshop files!


There are three files you'll need to make. Page one contains the names of the bride and groom and the date of the wedding. Therefore, the only thing you'll need to change on the photoshop file is the bride and grooms name.


Page 2 contains information about the bridal party and parents, therefore all names and titles will be needed to change this! Page 2 file here.


Finally, the front of page 3 contains information about the ceremony so again, it's a complete overhall of information on it.


The back of page 3 is our 'thank you' for attending and our 'signature'. Page 3 front and back files here.


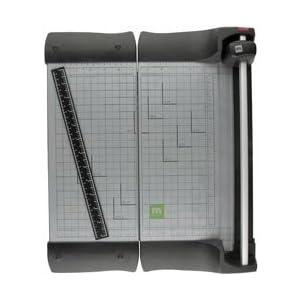
Once you've edited the photoshop files, you'll need to print them! I cut the card stock before I printed - MADE IT A LOT EASIER! For the white page (page 1) the size should be 4" tall by 4.5 inches wide. The ivory page needs to be 4" tall by 5" wide, and the final page is 4" tall by 5.5 inches wide. (so the total dimensions when it's assembled is 4" by 5.5"). I used my making memories paper trimmer!


I would highly recommend cutting the paper before you print because when you're printing on an ink jet it can get crooked. I used the same paper for my invitations, menus and programs and I bought it in bulk here. The three colors I used were: brilliant white, ivory and gray (in that order for first page to last page). It cost about $100 but I used the 250 pages for my menus, programs, place cards and invitations so it was an excellent deal. Also, I ran low at one point and found out I could buy it by the sheet at FedEx/ Kinkos. It's more expensive, but if you only need a few sheets, it's a good way to go (I think it was 15 cents a sheet).

After you've cut the pages down to size, print them out! Remember, page 3 is two sided so make sure you put the paper in the right way to print the back side (you may need a couple extra sheets for errors, I messed this up SEVERAL times!). I bought a new printer because mine was old, and it worked wonders! It is an Epson Workforce 600. I picked it up at Sam's club for <$90.


Now that they're printed, it's time to assemble!


Supply list needed for assembly: 


Eyelets/ Grommets


Crop-A-Dile (or other eyelet setter) This thing both punches the appropriate sized whole AND sets your eyelet. I will warn you - after doing about 20 of these your hand will hurt!


The Assembly:


Fist things first, align the three pages together and adjust the crop a dile puncher to where you'd like to put your whole (I did it about 1/2" from the top and 1/2" from the left). Punch it! Place grommet in whole. Use Crop-a-dile to set grommet and viola! 1 Program down, lots to go!

Here's the front:


And the back: